
How to Use an Edge Stress Meter for Glass Quality Testing

Glass quality often depends on stresses that remain invisible after cutting, polishing, or tempering. A small crack near the edge can begin with uneven processing or careless handling. For manufacturers, inspectors, and laboratory technicians, measuring this stress provides valuable evidence before glass reaches installation.

An edge stress meter helps evaluate compressive and tensile stress along a glass edge. It can support quality checks for tempered, heat-strengthened, laminated, and architectural glass. However, the instrument does not replace professional judgment. A reliable test requires clean surfaces, correct calibration, stable lighting, and a trained operator. Even a clear reading can mislead.

Before testing, inspect the edge for chips, coating residue, moisture, or visible damage. Clean it gently. Check the meter against its reference standard. Place the sensor evenly on the selected area, then avoid excessive pressure. Read the result carefully. Record the value, glass type, thickness, test location, and environmental conditions. Repeat the measurement at several points.

Small details matter.

Experienced technicians compare readings instead of trusting one number. They also consider cutting history, furnace settings, cooling patterns, and handling records. The process is not flawless. Temperature changes, rough edges, and poor alignment may affect the result. If measurements vary widely, stop and investigate rather than forcing a convenient conclusion.

This guide explains how to use an edge stress meter with practical attention to preparation, operation, interpretation, and documentation. It also highlights common mistakes that can weaken otherwise useful testing. The goal is not merely to obtain a measurement. It is to build dependable evidence for safer, more consistent glass quality decisions.
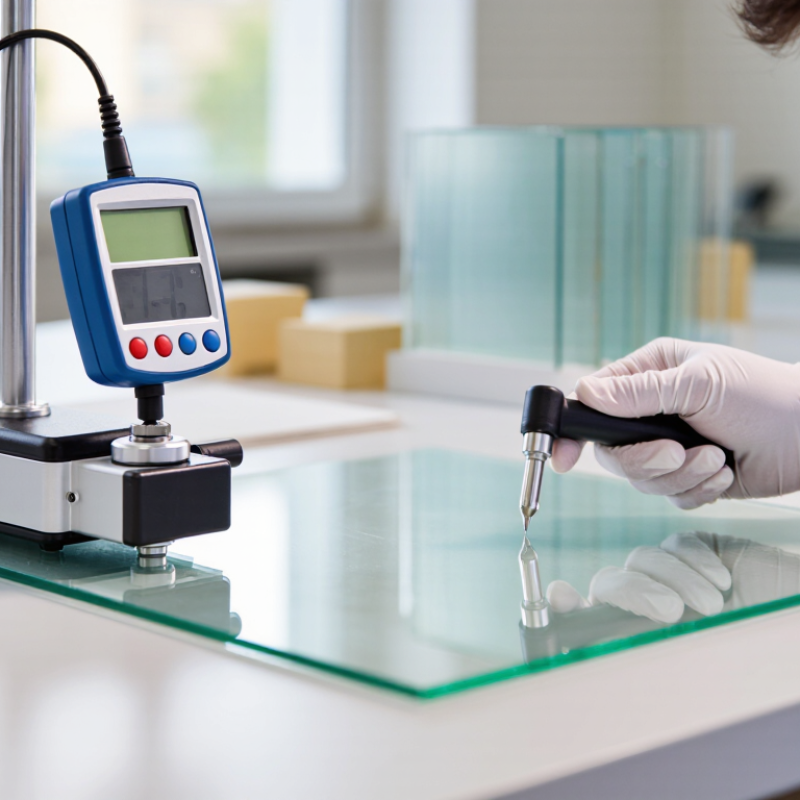
How to Use an Edge Stress Meter for Glass Quality Testing

What an Edge Stress Meter Measures in Glass

An edge stress meter evaluates residual stress concentrated near a glass edge. It does not simply report whether glass is “strong.” Instead, it shows how manufacturing, cutting, grinding, or thermal treatment has changed the stress condition. Many instruments use photoelastic measurement. Polarized light passes through the edge, and optical retardation indicates stress-related birefringence. The meter then converts that signal into a stress value, commonly expressed in megapascals.

The reading can reveal compressive stress, tensile stress, or an uneven transition between them. Compressive stress may improve resistance to crack growth, while tensile stress can make a tiny edge flaw more dangerous. Operators normally inspect several locations, including corners and recently processed areas. A stable fixture, clean edge, correct glass thickness, and proper calibration matter. Even a small tilt can change the optical path and distort the result. Record temperature and measurement position too.

A useful test compares readings with the product specification and expected processing history. One number is rarely enough. The meter measures local stress, not impact strength, fracture behavior, or every hidden defect. That limitation deserves attention. A practical mistake is accepting a comfortable reading after checking only one edge. Do not rush. Repeat measurements and examine the edge under suitable lighting. If results vary widely, pause before adjusting production settings. The cause may be poor contact, contamination, uneven grinding, or a real stress gradient. Reliable testing combines instrument data with visual inspection, process records, and controlled sampling.

How to Use an Edge Stress Meter for Glass Quality Testing

What an Edge Stress Meter Measures in Glass

An edge stress meter measures residual stress along the glass edge, usually reported in megapascals (MPa). Tempered glass normally shows compressive stress near the edge, while the stress decreases with distance and may transition toward tensile stress inside the glass. A consistent profile helps identify edge damage, inadequate tempering, or excessive tensile stress.

Preparing the Glass and Meter for Accurate Testing

Accurate edge-stress testing begins before the meter touches the glass. Inspect the edge under bright, even lighting for chips, cracks, coating residue, or visible contamination. Clean the surface with a lint-free cloth and a suitable glass-safe solution. Allow it to dry completely. Moisture can affect contact and create misleading readings.

Let the glass and meter reach the same room temperature before testing. Sudden temperature differences may change stress behavior and reduce repeatability. Check the meter’s sensor, cables, and display for damage. Confirm the battery has enough power. Calibrate the instrument with its approved reference piece, following the operating instructions carefully. Do not skip this step. A small calibration error can become significant across many samples.

Place the glass on a stable, vibration-free support. Keep the tested edge accessible and free from pressure. Align the sensor consistently with the edge, using the same angle and contact force for every measurement. Mark each test location lightly, especially when comparing production batches. In practice, operators sometimes press harder when a reading looks unusual. That habit needs correction. Repeat the measurement instead. Record the glass thickness, temperature, location, and reading immediately. If results vary widely, pause and inspect the edge again. The problem may involve preparation, alignment, or an imperfect reference check rather than the glass itself.

How to Use an Edge Stress Meter for Glass Quality Testing - Preparing the Glass and Meter for Accurate Testing

Test Stage Data Dimension Recommended Condition or Value Preparation or Measurement Method Quality Record
1. Glass identification Glass type and thickness Record the actual composition and nominal thickness, such as annealed, heat-strengthened, or fully tempered glass. Check the production label, drawing, or specification before testing. Do not mix samples with different thermal histories. Sample ID, glass type, thickness, batch or lot reference
2. Surface cleaning Contamination level The tested edge and measurement area should be free from oil, dust, abrasive particles, labels, and loose coating residue. Wipe with a clean, lint-free cloth and a compatible glass cleaner. Allow the surface to dry completely before placing the meter. Clean / not clean; cleaner used; drying completed
3. Edge inspection Chips, cracks, and notches No active crack, large chip, deep score, or sharp damage should be present at the measurement location. Inspect both faces and the full edge under good lighting. Mark damaged areas and avoid measuring directly over them unless the procedure specifically requires it. Damage location, approximate size, photograph reference
4. Edge preparation Edge finish Use a stable, representative edge such as seamed, ground, or polished glass; document the finish because it can affect local stress readings. Remove loose particles without rounding or altering the edge. Keep the meter contact area fully supported and aligned with the edge. Edge finish, edge condition, support method
5. Environmental stabilization Temperature and humidity Glass and meter should be at the same stable room condition; a practical laboratory range is approximately 20–25 °C with moderate humidity. Keep the sample away from direct sunlight, heaters, cold airflow, and condensation. Allow sufficient time for temperature equalization. Room temperature, relative humidity, stabilization time
6. Meter inspection Instrument condition Meter body, optical components, contact surfaces, cable, display, and battery should be clean and undamaged. Check the operating instructions, measurement range, units, and warning indicators before use. Instrument ID, inspection status, battery status
7. Zero or reference check Baseline response The meter should pass its supplied zero, reference, or verification procedure before sample measurements begin. Use the correct reference piece or built-in routine. Do not adjust calibration to force a sample result into an expected range. Reference result, verification status, date and time
8. Meter positioning Contact angle and alignment Maintain consistent contact, orientation, and measuring distance for every reading. Place the meter steadily on the designated edge area. Avoid rocking, twisting, excessive force, or gaps between the sensor and the sample. Positioning method, operator initials, repeatability notes
9. Measurement locations Sampling pattern Use a documented pattern covering representative edges and corners; avoid visibly damaged locations unless they are part of the investigation. Mark locations on a sketch or image. Keep spacing consistent and record the edge orientation, such as top, bottom, left, or right. Location map, number of points, edge orientation
10. Repeated readings Repeatability Take at least three readings at representative points when the test procedure does not specify another sample size. Lift and reposition the meter between readings. Calculate the average and range only when the readings are made under equivalent conditions. Individual readings, mean, minimum, maximum, range
11. Stress result Measured edge stress Report the value in the unit displayed by the meter, commonly MPa, and identify whether the reading represents compression, tension, or a signed stress value. Follow the instrument procedure for interpreting the optical or photoelastic response. Do not compare values produced by different methods without validation. Reading, unit, sign convention, measurement point
12. Acceptance decision Specification comparison Accept or reject only against the applicable product standard, customer specification, drawing, or validated internal limit. Consider glass type, thickness, edge condition, sampling plan, measurement uncertainty, and any required retest rules. Specification reference, pass/fail status, reviewer approval
Testing note: Edge-stress readings are affected by glass type, thickness, edge finish, temperature, alignment, surface cleanliness, and instrument calibration. Use the applicable test method and product specification for final conformity decisions.

Setting Up the Edge Stress Meter Correctly

Setting up an edge stress meter correctly determines whether glass quality results can be trusted. Place the instrument on a stable, clean bench. Keep the area free from vibration, dust, and strong direct light. I usually allow the meter to reach room temperature before testing. Temperature changes can affect optical readings.

Inspect the glass edge under good lighting. Remove loose particles, oil, and fingerprints with a suitable lint-free cloth. The edge must sit firmly against the measuring guide. Do not force the glass into position. Check the display, measuring scale, and reference setting before taking readings. A certified reference piece can confirm whether the instrument responds correctly. Test it several times. The readings should remain reasonably consistent.

Hold the glass at the same angle for every measurement. Mark each test location with a removable pencil, not a permanent marker. Record the glass thickness, edge condition, temperature, and measurement direction. These details help explain unusual results later. I once overlooked a small chip near the test area, and the reading changed noticeably. That mistake was avoidable. Repeat any doubtful measurement after repositioning the sample. Never rely on one reading alone. If the values still vary, check the guide, calibration, and edge surface before judging the glass. A clean setup supports better decisions, but it cannot correct damaged samples or poor handling.

Measuring and Interpreting Glass Edge Stress

How to Use an Edge Stress Meter for Glass Quality Testing

Measuring and Interpreting Glass Edge Stress

An edge stress meter helps evaluate whether glass edges can withstand handling and installation. Clean the edge before testing. Dust, fingerprints, and moisture can distort optical readings. Calibrate the instrument according to its technical procedure. Place the sensor steadily against the edge, without rocking it. Record several readings along the same section. Glass edges often show changing stress near corners, notches, or polished areas. Compression usually improves resistance to small cracks. Excessive tension can make an edge more vulnerable. Do not judge quality from one reading alone.

Tips: Keep the glass at a stable room temperature. Mark each measurement location. Use consistent pressure and alignment. Compare readings with the approved specification, not personal expectations. If the values vary sharply, inspect the edge under suitable lighting. Tiny chips may explain an unexpected result.

Interpretation requires process knowledge and careful judgment. Compare the average reading with the lowest reading. The lowest value may reveal the real handling risk. Check whether the variation matches the cutting, grinding, or tempering process. A high number is not automatically better. Uneven stress can create weak zones beside apparently strong areas. I sometimes repeat a test after cleaning, because the first result may look convincing but remain unreliable. The meter also has limits. It cannot replace visual inspection, dimensional checks, or controlled breakage analysis. Document the glass type, thickness, test location, temperature, and operator. This record supports traceable quality decisions.

Maintaining the Meter and Verifying Test Results

An edge stress meter is only useful when its readings remain stable and traceable. Glass testing begins with maintenance, not with pressing the probe against the edge. Before each shift, inspect the contact tip for chips, dust, or uneven wear. Clean it with an approved lint-free material, then check the meter’s zero reading. Keep the instrument away from sudden temperature changes and excessive vibration. Small contamination can distort a serious decision. Store it in a dry, protected case after use.

Verification should use a certified reference piece or a laboratory-controlled sample with known stress values. Measure the reference at several points, using the same pressure and angle applied to production glass. Record the readings, ambient temperature, operator, and instrument condition. Repeat the test without changing the setup. Close agreement suggests repeatability, but it does not prove the glass is acceptable. Compare results with the project specification and approved acceptance limits. If readings drift, stop testing and investigate calibration, alignment, and surface cleanliness.

I once trusted a steady display before noticing a worn contact tip. The readings looked convincing. That mistake taught me to question consistency, not just a single number. An experienced technician should review unusual results and confirm them with another method when practical. Photographs of the edge, test records, and maintenance notes improve traceability. Do not adjust calibration casually. Use documented procedures and trained personnel, even during production pressure. Reliable verification is repetitive, sometimes inconvenient, and essential.

Article Source:

dLED: retail LED lighting
Privacy Overview

This website uses cookies so that we can provide you with the best user experience possible. Cookie information is stored in your browser and performs functions such as recognising you when you return to our website and helping our team to understand which sections of the website you find most interesting and useful.